
Want to know how to do product photography like a pro without spending thousands on lights, models, or photographers? In 2026, AI product photography makes it simple and affordable. With tools like Olio AI, you can upload a basic product shot and get stunning, production-ready images in minutes—perfect for e-commerce, Shopify stores, Etsy listings, or social ads. This guide walks you through the exact process step by step, showing how anyone can create high-converting product photos using AI—no prior skills needed.
Traditional product photography often costs $50–$500 per image and takes hours. AI flips that: save 10x time and up to 100x money while getting natural, scroll-stopping visuals. Let’s dive into the best way to do product photography today.

Why Learn How to Do Product Photography with AI in 2026?
Great product photos boost conversions by 30–80% (source: Shopify). But hiring pros is expensive and slow. AI product photography solves this by enhancing real uploads with perfect lighting, backgrounds, angles, and details—no reshoots required. Benefits include:
- Instant professional quality from phone shots
- Endless variations (angles, backgrounds, moods)
- Scalable for large catalogs
- Cost drops to ~$0.50 per image
Whether you’re a dropshipper, small brand, or fashion seller, mastering how to do product photography with AI levels the playing field.
What You’ll Need to Get Started
Minimal setup required:
- A smartphone or camera for initial product shots (good natural light helps)
- Olio AI account (starts at $19/mo for 200 credits)
- Basic product (apparel, accessories, gadgets—clean background ideal)
- Internet connection
No studio, no models, no fancy gear. Just upload and let AI handle the rest.
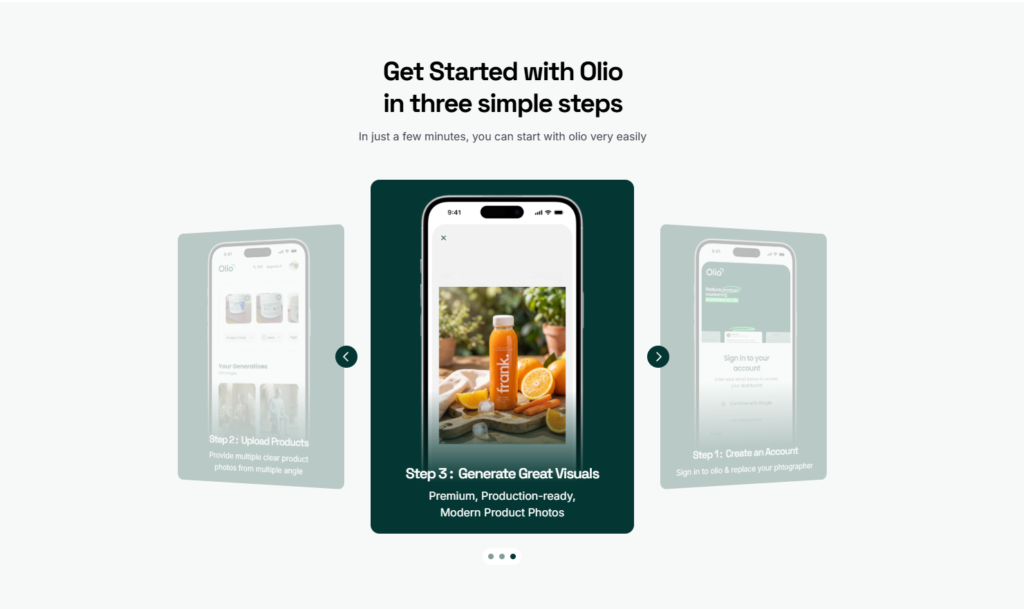
Step-by-Step Guide: How to Do Product Photography with Olio AI
Olio AI stands out for its dead-simple workflow: no complex prompts—just upload and configure. Here’s the complete process to create pro-level product photos.
Step 1: Upload Your Product Image
Head to tryolio.app and log in (or sign up free to test).
Click “Upload” and drag-drop your raw product photo (or select from device). Best practices for upload:
- Use a clear, well-lit shot (even phone camera works)
- Plain or removable background is ideal
- Multiple angles if possible (front, side, top) for better results
- File types: JPG/PNG, up to reasonable size
Once uploaded, Olio processes it automatically—no need to describe anything. This simplicity is why it’s one of the easiest ways to learn how to do product photography in 2026.
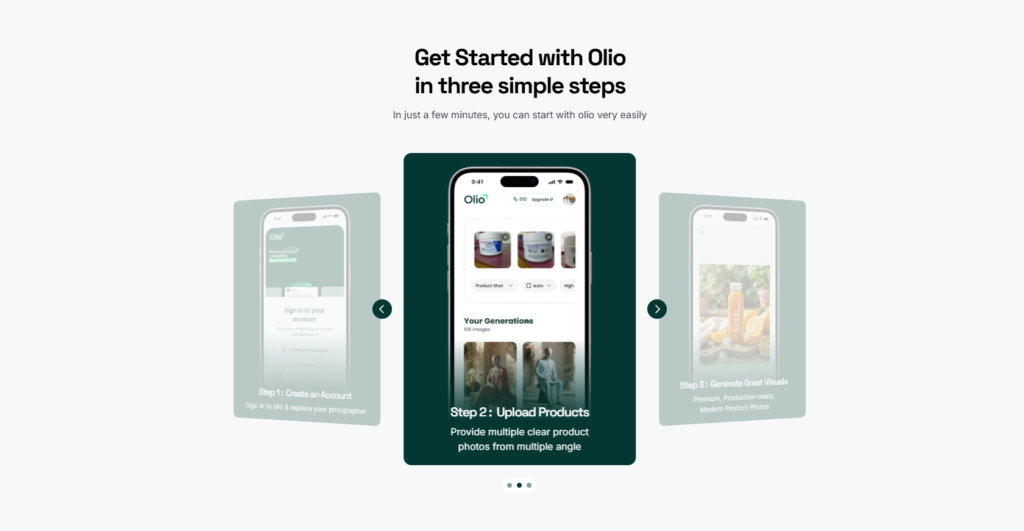
Step 2: Select Your Configurations for Custom Results
After upload, customize to match your brand. Olio offers intuitive options—no coding or prompt engineering required.
- Choose Mode: Pick Product Photoshoot for standard items or Mannequin Mode for apparel/fashion (ethical mannequin-based for natural on-model looks without real people).
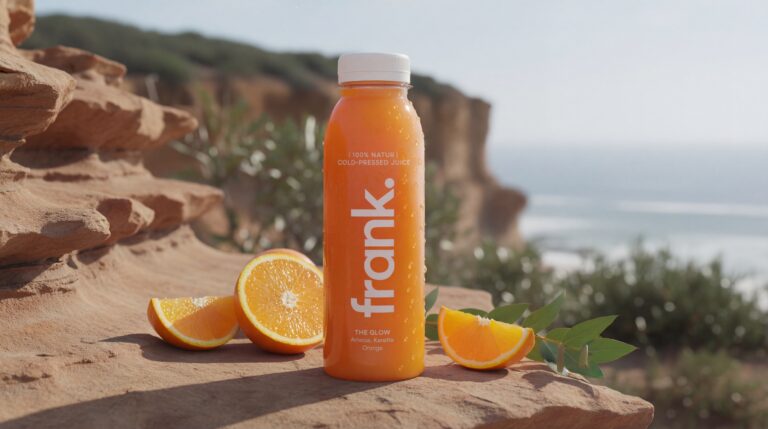
- Select Background: Choose from dozens of styles. For product photography: E-commerce Clean, Studio Professional, Lifestyle Modern, Minimalist Zen, Rustic Natural, Marble Luxury, Industrial Urban, Bright Fresh, Dark Moody, Botanical Garden, Culinary Kitchen (great for lifestyle), Tech Modern. Mix and match for variety.
- Select Models (Olio Pro / Olio Studio): Opt for pro-level human models in Olio Studio for realistic on-figure shots (fashion, accessories) or keep it simple with Pro for clean product focus.
- Aspect Ratio: Pick square (1:1 for Instagram), landscape (16:9 for ads), portrait (4:5 for stories), or custom for Amazon/Shopify listings.
- Advanced Tab Options:
- Camera Angles: Eye Level (standard), Top View (flat lay), Low Angle (heroic), Side View (profile), Three Quarter (dynamic), Close Up (details).
- Custom Prompting: Optional—add tweaks like “warmer tones” or “high contrast” if needed, but most users skip for fast results.
These options let you create consistent brand visuals fast. Experiment with combinations to see what converts best.
Step 3: Hit Submit and Generate Your Professional Product Photos
Review your settings, then click “Submit” or “Generate.”
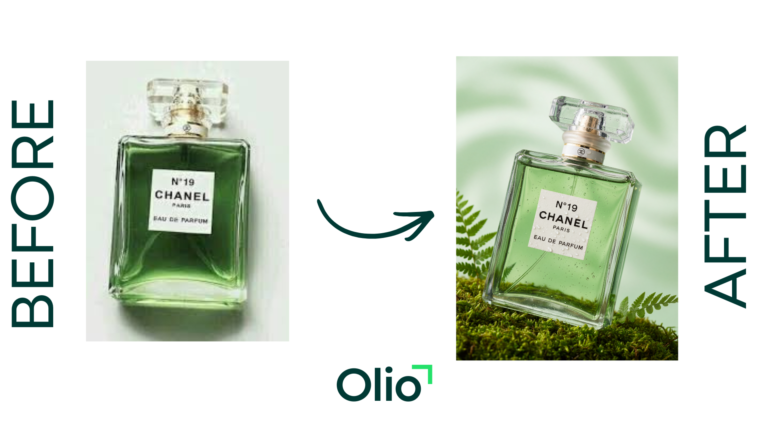
Olio AI processes in seconds to minutes (depending on complexity). You’ll get high-res (up to 4K) images with natural lighting, shadows, textures—no AI artifacts or “weird vibe.”
Download individually or in batch. Use them directly on your store, ads, or social. If needed, regenerate with tweaks—credits are affordable for scaling.
Tips to Get the Best Results Every Time
To master how to do product photography with AI:
- Start with clean uploads—remove distractions in free apps if needed.
- Use Olio Magic Mode (auto-enhance) for instant production-ready polish.
- Test multiple backgrounds/angles—track which drive more clicks/sales.
- Batch upload for catalogs to save time.
- Combine with your existing photos for before/after demos on social.
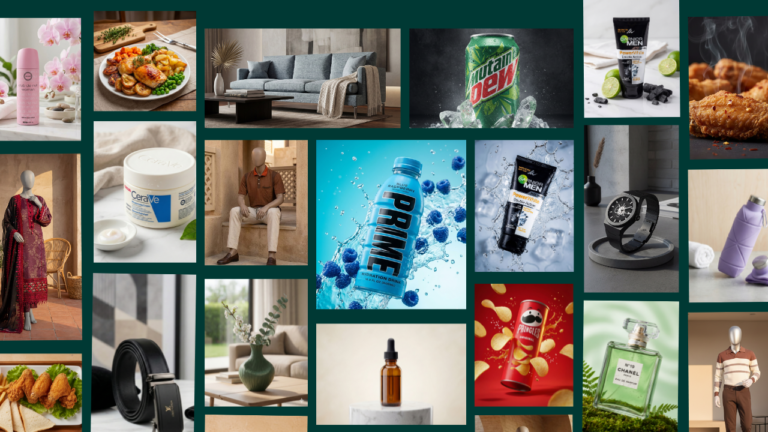
Real users report 70%+ positive feedback and massive time savings. See examples on tryolio.app.
Common Mistakes to Avoid in Product Photography
Even with AI:
- Poor initial lighting → Use natural window light for uploads.
- Over-customizing prompts → Keep simple for natural results.
- Ignoring aspect ratios → Match platform needs (e.g., square for IG).
Avoid these, and your photos will outperform traditional shoots.
Why Olio AI Makes Product Photography Accessible for Everyone
Olio AI removes barriers: no studio, no skills, no high costs. It’s built for e-commerce brands scaling fast—ethical, fast, and results-focused. Start small, see conversions rise, then scale.
Ready to Try It Yourself?
Learning how to do product photography has never been easier. Upload your first product today and transform it into pro visuals in minutes.
Head to tryolio.app—plans start at $19/mo. Create your first set for free (limited) and upgrade as you grow. Your products deserve visuals that sell. For free demo with your own product reachout them at teamennovat@gmail.com
For making stunning visuals for E-commerce product photography effortlessly read this article
Have questions about AI product photography? Drop them in the comments—we reply to every one!